
DreamHost, established in 1999, is a hosting provider based in the United States that has served over 400,000 users and hosted more than 1.5 million websites. DreamHost offers a range of services, including domain registration, shared hosting (including specialized WordPress hosting with special optimization), VPS, VPS cloud hosting (on the OpenStack cloud platform), cloud storage, and dedicated servers. Furthermore, DreamHost has been a recommended hosting provider by the renowned open-source platform, WordPress, for many years.
WordPress is the preferred choice for foreign trade businesses when it comes to building websites. DreamHost is one of the three hosting service providers recommended by WordPress. So, can you use DreamHost hosting to build an independent foreign trade website using WordPress? The answer to the above question is definitely yes. There are no issues with using DreamHost for foreign trade website development.
Official Website Click here to visit the official DreamHost website.
WordPress Tutorial WordPress is the most widely used website building system abroad, and DreamHost is one of the hosting providers officially recommended by WordPress. Therefore, using DreamHost hosting to build a WordPress website is a great choice.
DreamHost hosting comes with a one-click WordPress installation feature, which means you don’t need to have professional web development skills. With just a few easy steps, anyone can set up a WordPress website.
DreamHost One-Click WordPress Installation Tutorial
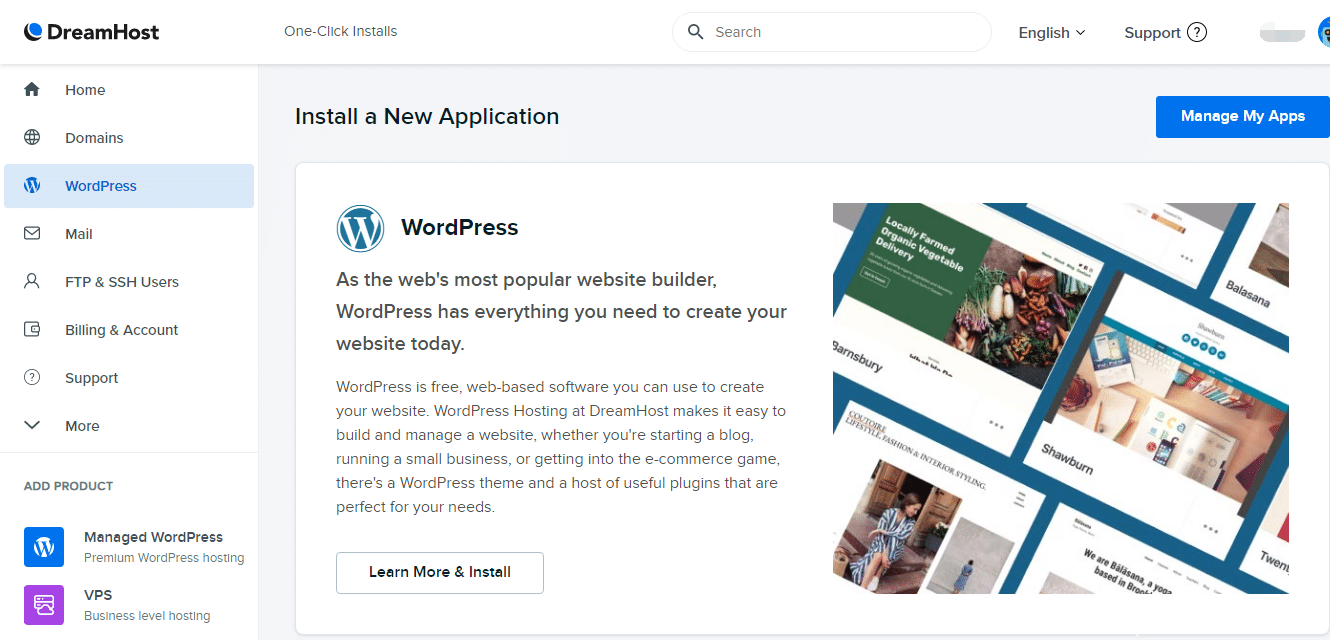
Step 1: After logging into the DreamHost hosting control panel, click on the WordPress menu on the left. On the right, you will see the one-click WordPress installation interface. Click “Learn More & Install” to access the WordPress installation page.
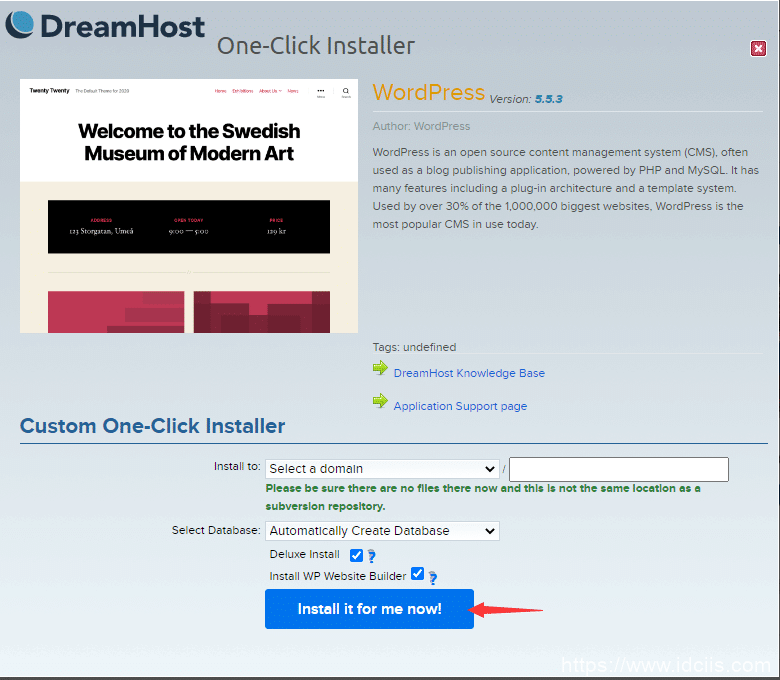
Step 2: On the WordPress one-click installation page, you need to configure the settings for the WordPress installation.
- Start by selecting the domain name where you want to install WordPress (you can see the available domains in the drop-down menu) and the installation path (you can choose to install in the root directory or a subdirectory).
- Next, choose the database for your WordPress website (Select Database). It will automatically create a database by default, but you can also choose an existing one if you prefer.
- Click the “Install it for me now” button to start the installation.
After the installation is complete, you will receive a successful installation notification, and DreamHost will also send you an email notification.
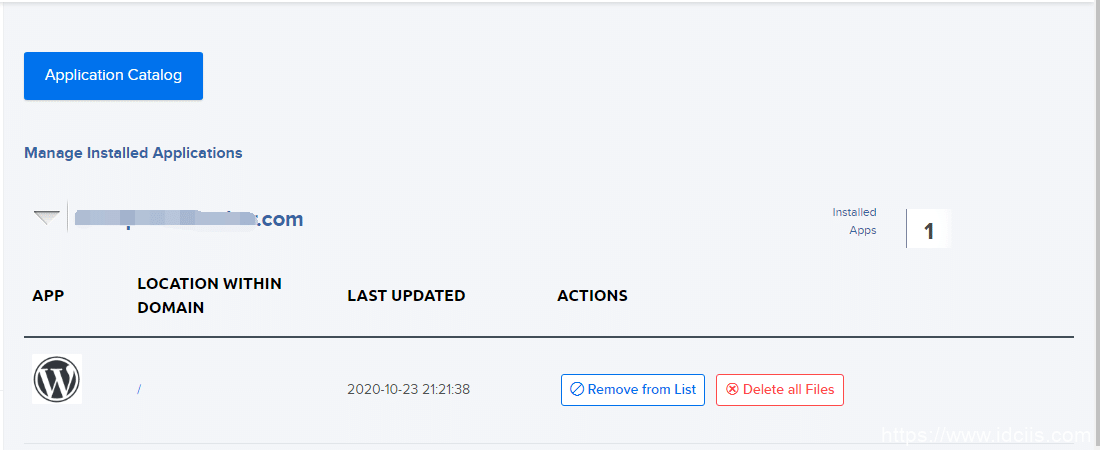
Managing Installed WordPress To manage the WordPress installations you have, click “Manage My Apps” in the top right corner of the WordPress installation page in the DreamHost control panel.
Clicking the triangle icon next to the website domain will display installation information. Under the “Actions” section, you can choose to delete an installed WordPress site (Delete) or remove it from the list (Remove from list).
Please note that “Delete” will permanently remove the installed WordPress website, while “Remove from list” will only remove the information from the list without deleting the website.
The above steps cover the entire process of setting up a WordPress website on DreamHost hosting. With just a few clicks, you can easily complete the process.
Don’t wait any longer; purchase DreamHost hosting now and embark on your website building journey!